Woodcarving Safety–Dealing with gloves and first-aid
Woodcarving safety means always wearing a woodcarving glove and not carving when you’re tired
From a lack of woodcarving safety, last night, one cut too many before going to bed, fatigue, a dulled blade, and no safety glove led to two bad cuts on my fingers. My disregard for several important woodcarving safety rules should have led me to a local ER. But some important first-aid techniques have so far kept me from getting stitches.
This post is meant to serve as a helpful reminder to help you avoid similar mistakes.
When it comes to woodcarving, safety is key; but let’s be real, newer carvers like myself often disregard a good glove and suffer those little slips that make our hearts skip a beat!
Whether you are just starting out in the world of whittling or a seasoned pro at creating delightful wooden pieces – there are essential safety measures to follow. As Gene Messer oft says, “In other words,” you should keep these safety measures at your fingertips if you want to keep your fingertips.
Safety First – Always wear protective gloves and safety goggles before you start carving
Last night, YouTube carvers were on the TV while I did my evening recliner carving spree. I’m working on a modified Harley Refsal carrot to sell as place makers for Easter dinner table settings.
Almost three hours in, I’d carved almost a dozen carrots and switched to work a little on a 2″ x 2″ x 6″ basswood Easter Bunny I’ve been working on in my “spare time.”
After hundreds of cuts, one slip while trying to cut out bunny ears, I ended up with a gnarly cut on two left-hand fingers.
Literally, a bloody mess.
Is there a moral to this woeful story? Something I can point to? (Pun intended.)
You bet your life there is.
Always wear a protective glove while carving basswood
You may think, “Heck, woodcarving gloved are for newbies. Doug Linker and Gene Messer don’t wear gloves when they carve for YouTube, so why should I?”
One, you’re not either one of them, and there are dozens of videos where they have on gloves. Maybe they don’t wear them so much for making videos, but like most carvers, they have aversions to cutting their fingers. You should, too.
Second, there are okay gloved and then there is kevlar.
A particular point to make regardless is that safety gloves are meant for stopping accidental swipe cuts. But point a 1-3/4s razor-sharp tip of a knife into almost anything and the tool is going to make a hole.
Now I don’t own a kevlar glove, yet. But I’m ordering one today. Kevlar is the stuff the Secret Service uses to stop bullets. But is it worth trying to see if a bullet-proof substance will stop a knife blade?
I’m not in any rush to try and find out.
What to look for when selecting a carving glove
When it comes to carving, a good carving glove can mean the difference between success and a trip to the emergency room.
So, what should you be looking for when selecting a carving glove? First and foremost, make sure it’s made from durable materials that can withstand the rigors of cutting through a hard piece of basswood.
Second, ensure that it fits snugly on your hand to prevent any slippage. Often my index and middle lefthand fingers are also wrapped in carving gauze tape for extra protection.
Last night my hands were exposed; no glove, no tape.
This inexpensive glove I bought last fall is not safe enough for me. As you can see, I’ve cut several holes in it since October.
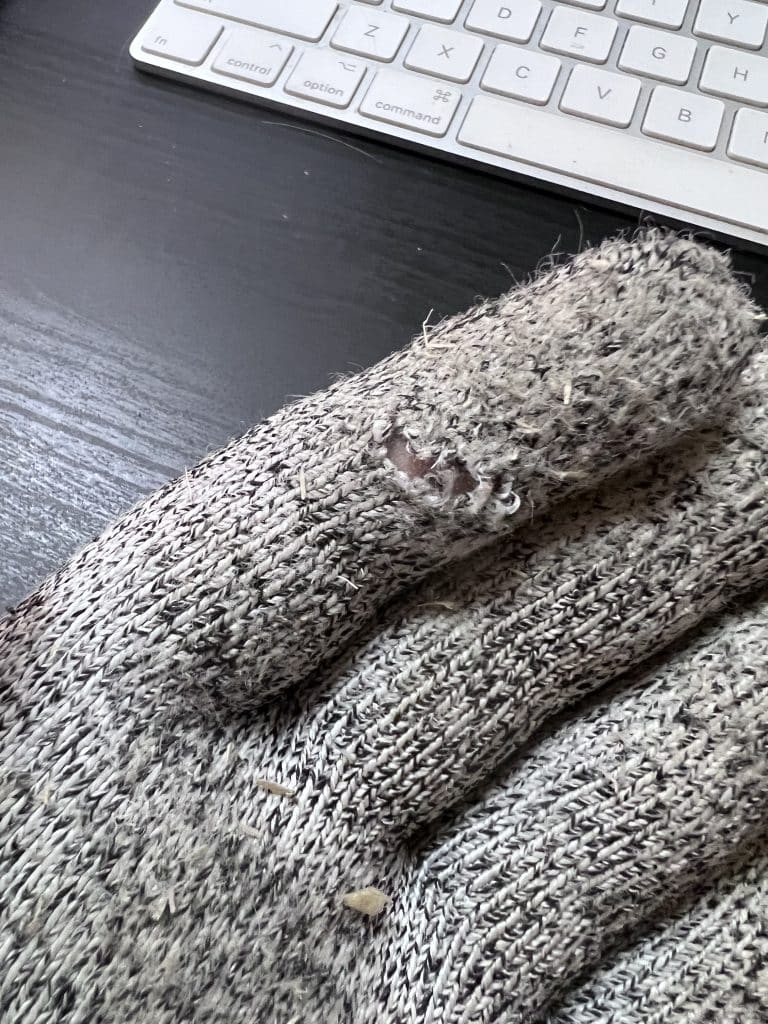
I bought this woodcarving safety glove last fall. Already, it’s gotten cut up. It’s time to upgrade to one made of Kevlar.
Take a Break – Don’t attempt to carve for long periods of time
The importance of taking a break cannot be overstated.
Temptation often leads carvers to dive headfirst into a carving project, staying up all night until it’s complete.
This is a recipe for disaster.
You don’t want to end up with a half-finished carving that looks like it was attacked by a toddler with a butter knife.
So, take a breather! If you’re wearing your Apple Watch, heed the hourly notifications to stand up for at least three minutes each hour.
Do some stretches. Make a cup of tea or coffee. I turn to YouTube on my Apple TV and binge-watch Linker, Messer, et al. woodcarving episodes. The night before last it was a channel of The Beatles.
Take a break and your carving skills will thank you for it.
Plus, what creative doesn’t love a good excuse to procrastinate?
Use Sharp Tools – Dull tools take longer to use, and are more dangerous than sharp ones
Here’s some sound advice: never use dull tools!
Not only do they make the task at hand a total drag, but they also become quite dangerous.
Try slicing through a tough steak with a butter knife – it’s a recipe for accidental self-harm.
The same goes for woodcarving knives, gouges, V-tools, and other sharp objects.
You might think you’re saving money by avoiding sharpening your tools.
However, there is no substitute for a well-stropped tool.
The last thing you want is to end up with a gnarly cut because you got lazy and failed to keep your tools sharp.
Keep It Simple – Stick to basic shapes and avoid intricate designs until you have more experience with woodcarving
Woodcarving can be a delightful hobby, filled with the satisfaction of creating something beautiful from a piece of raw wood.
While you’re still a beginner, however, stick to simple and small projects. These help you hone your cuts. Ones where you’re not carving at an angle while roughing out a nose. Where you need to cut in straight and deep.
The intricate designs may look appealing, but attempting a complicated shape before you are ready can lead to a pile of sawdust, frustration, and cuts in your hand, not the basswood.
Think of this like playing the piano. You start out with scales and teach your hands to do differing patterns while doing scales.
You don’t start out with Bach’s fugues, Beethoven’s sonatas, or 64th-notes by Liszt.
Woodcarving is an experience that relaxes the soul. Often, the simplest designs have the most beauty. As you progress, increase your level of difficulty.
This is when you work into Bach’s Well-tempered Clavier or Beethoven’s Moonlight Sonata.
Liszt? Find a piano channel on SiriusXM or iTunes and listen; unless you’re the Eddie Van Halen of the piano….
My plan of action for dangerous cuts
Having a plan of action for dangerous cuts is as important as picking out a good knife to purchase.
Common sense, basic first-aid, and a few key products are critical to keep on hand while carving.
First off, always remember that fingers are not meant to be used as cutting boards.
Second, invest in quality tools and keep them sharp; good tools really are not that expensive and you only need a few to get started.
Dull blades are the most dangerous part of woodcarving. They make for sloppy cuts and increase the chances of slips and injuries.
Never underestimate the importance of protective gear. Gloves may not look sexy, but they’ll keep your hands safer in case of accidents.
Keep a first-aid kit at the ready. What should you have in one at the bare minimum?
Donald J. Claxton’s first-aid kit
My first-aid kit includes Bleed Stop. I also keep Neosporin, New Skin, band-aids, gauze, and tape handy, too.
When I suffer a cut, the first thing I do is keep calm and grab the place I’ve cut with my other hand and apply direct pressure. Once I can grab a paper towel or clean wash rag, I cover the wound, reapply direct pressure, and then lift my hand above my head to slow the blood flow.
As soon as I can pour cool water into the cut to flush it out, I do. Most often, maintaining direct pressure on the wound while it’s under the water is necessary, too.
When blood is no longer flowing like rapids, I apply Neosporin and get it into the cut to kill any bacteria and hopefully avoid an infection.
If it is still bleeding like it was, I’ve reached a fork in the road. Fix it at home or go to the ER.
So far, I’ve been lucky enough to not require a ride to an urgent care facility or ER. But if you need to go to one, don’t hesitate.
My cuts, thankfully, have not gone too deep into the skin. Yes, they’ve been bloody as hell, but I’ve gotten the blood to stop gushing using the methods above.
But for a cut that’s a little deeper, but not quite deep enough for an emergency run, I wash the cut further, getting the Neosporin washed out, and then I’ve used “New Skin,” a product that stings going on, but helps begin making synthetic skin in order to seal a cut.
Last night I debated using the ultimate over-the-counter product, Bleed Stop, but the New Skin did the job.
Bleed Stop
My friend Joel Porter, a former Scoutmaster, told me when I cut my hand in Upper Michigan last summer about Bleed Stop.
Four packages come in a box. I keep one in my briefcase bag, one in the drawer beside where I sit and carve in the recliner, one in the console of the car, and the fourth in a mini-first-aid kit that’s next to my carving desk.
The box says Bleed Stop is used in operating rooms to stop wounds that won’t stop bleeding. You tear open the packet and then dump it onto your wound. This is supposed to make your blood coagulate and stop the bleeding. Thankfully, I’ve not ever needed to take this step, but I keep the product close at all times.
Did I mention I’m also on blood thinners? Yes, so this stuff is extra important.
Donald J. Claxton’s woodcarving safety tips….
Woodcarving safety can mean the difference between a truly rewarding experience and cutting your fingers to pieces. Here are five woodcarving safety measures to keep in mind:
- Woodcarving safety must include always putting your safety first. Start with the right gloves and sharp, well-stropped tools.
- Don’t skip the fundamentals.
- Always use sharpened tools — dull ones can be more dangerous to your wood carving and yourself.
- And remember, have a plan for an accident—they will happen—and keep the first-aid kit close by when you carve.
- Having a plan for dangerous wounds will provide an important advantage for your safety.
In other words, save your own version of the Statue of David for Week 2 or 3. Maybe even year 5 or 6. Maybe.
What other safety measures do you practice while carving basswood?
Share them in the comments section below.
Be safe and happy carving!
Donald J.